
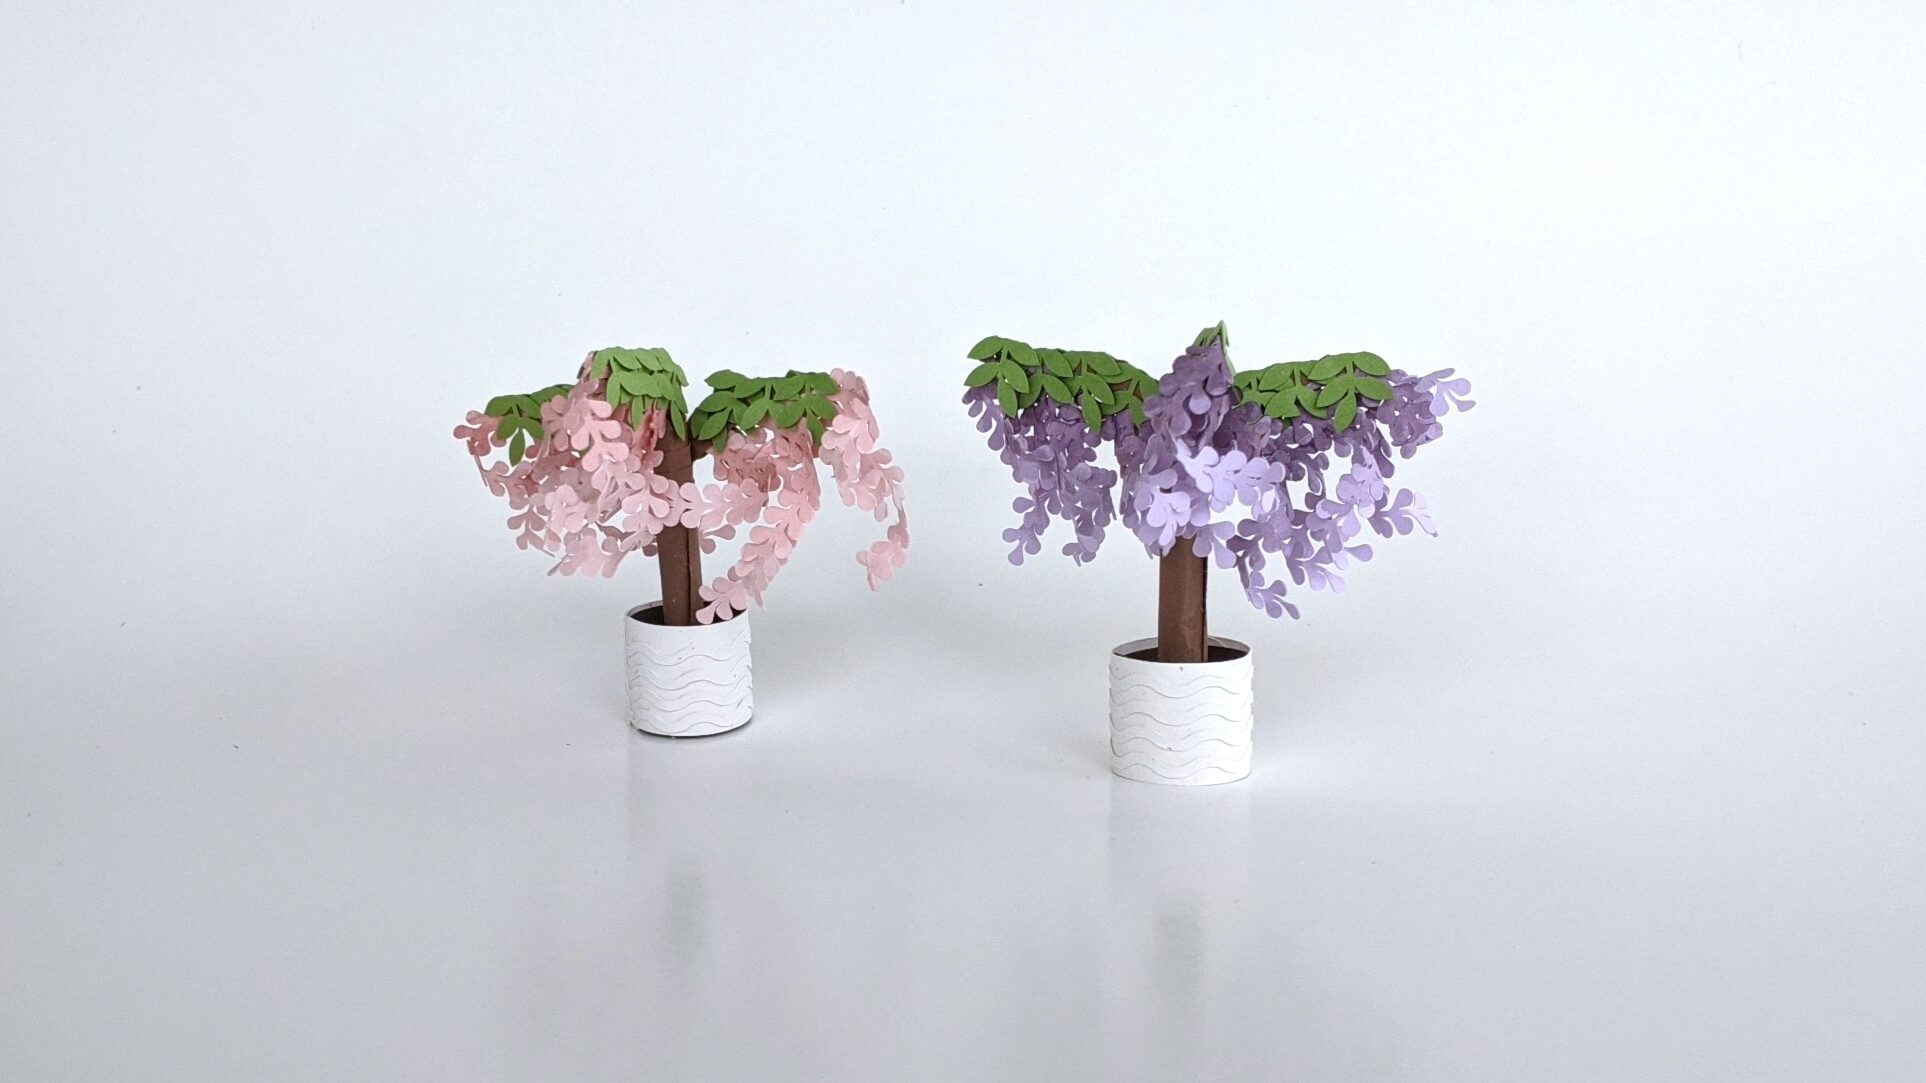
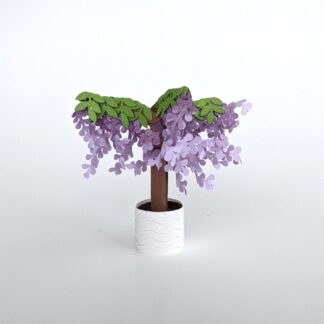
The Wisteria is such an elegant and beautiful tree. Its branches fill with brightly colored flowers every year, creating a waterfall of petals. Recreating such an iconic plant on a miniature scale is something that I had hoped to do for a long time, but until recently struggled to figure out the mechanics of how to (somewhat) accurately capture the flowing beauty of this tree. Luckily I was able to figure it out and have the Cricut tutorial (below) to prove it! Keep reading to make your own tiny trees.
Flowery Tree Branches
I began by working through a couple of different prototypes for the branches. I first tried threading the flowers onto the tree individually. After abandoning this approach, I arranged the flowers on a single branch, but this did not yield the depth required to do this tree justice. After toying around for a bit longer I began rolling the flowers around the end of a paint brush I had lying on my desk. This approach allowed for a quick cut time on the machine, but also brought the extra dimension I wanted to include for such a grand plant.
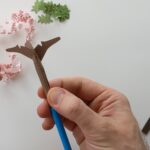
Once I had settled on an approach for the flowery branches, it was (mostly) smooth sailing. I had a trunk template from a prior design that I was able to modify for this template. The pinched green leaves sitting atop each branch took some trial and error, but not nearly as much as the flower branches themselves.
Assembling the Template
Assembling the design for the first time I knew I wanted the planter to be almost invisible, as to show off the tree itself. I settled on a white cardstock, with the slightest amount of colorful specks. I wrapped the base of the tree with the paper soil strips and stepped back for a view. It had worked!
This Mini Wisteria Tree is very easy to make using my cutting machine template. It has been live for a few days as of the time I am writing this and I have already seen it used in miniature houses, greeting cards, and 3D papercraft gifts.
The Wisteria flowers for the tree can also be cut separately and used on their own to imitate Wisteria vines! Follow along as I explain each step needed to create this design.
Products I Use
Everything shown below was cut on my Cricut Maker. I’m really happy with this product (hence why I blog about using it) and recommend it to anyone interested in any type of papercraft. Even if you prefer hand cutting with a knife, the machine is a great tool when prototyping or doing designs in bulk.
The glue I use for my crafts is from Bearly Art. I try and make it a point to reference them by name because I get asked on nearly everything I post about the type of glue I am using. The glue dries quickly which is a must, but if you have seen any of my mini assembly videos you will understand how amazing their ultra fine tip is! Links to Bearly Art from my website will carry over with a 10% discount automatically applied at checkout (as I am a member of their affiliate program).
Disclosure: this post features affiliate links (noted with bold), meaning if you purchase the product via my link I could earn a small commission. All products referenced are items I personally use for my crafts.
Mini Wisteria Tree

Miniature papercraft Wisteria tree assembly tutorial
- Cutting Machine
- Stick/Pen for roling
- 65lb Cardstock in various colors
- Craft Glue
- Watercolor paint
Load the file into your design software. The .zip folder will include various file types so make sure you are selecting the correct file for your design software. Each shape in the template will be a certain color to suggest what part of the tree it will correspond to, but feel free to adjust the colors as you like.

Proceed to cut each shape using your cutting machine. I recommend using 65 lb cardstock as it is pliable enough to roll the leaves/trunk, but will provide the right level of sturdiness for your design.

If you are going to paint any pieces of the template as I have done, I recommend doing this prior to starting construction. This gives the paint time to dry and absorb any glue properly during assembly. I added a light wash of watercolor paint onto the 'tops' of my Wisteria flowers. This could be done with most types of paint, marker, or even colored pencils.
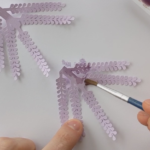
Roll each of the 5 flower stems around a pen/stick to create a coil. Please refer to the video below to see an example of this! This will create the 3D effect for each of the flowering branches. Repeat the rolling process for the other two branch pieces.

You will now need to roll the trunk of the tree, so that you have something to adhere the branches to. Use a quilling tool, or even a pen/stick will do, and roll from left to right (in the direction of the arrow). The piece should roll up into a cylinder with three branches sticking out in different directions on top. Place a few drops of glue inside the end of the trunk piece to seal it up.
You will notice that each branch of the tree has two flaps with a perforated fold line. Fold along these perforations, then glue one flower branch into the crease created.

Fold the leaf bundles in half, there is a dash line to help you identify where to fold each one. Glue 4 leaf bundles to the top of each branch.

Create the planter by curling the long solid strip to create a cylinder. Adhere the wavy portion to the outside if you would like a planter with more texture.

Wrap the base of the tree with the 'soil' strips. There are cut files included in the download to make these using your cutting machine, but I find it more effective to freehand cut a few strips of cardstock to ~ half an inch. This method creates less waste and extends the life of your mat/cutting blade. Do not glue the soil, but hold it in place with your fingers.

Plant your tree! Place the base of the tree into the planter. The soil should fill the planter almost entirely, so that when you let go it expands and holds the plant in place.
